Welcome ladies and gentlemen, i bring you yet another Warhammer 40k battle-report. This time things will get a bit more interesting, as the army i play against is not actually codex-standard army. It is and army out of Imperial Armour, which means that a lot of crazy stuff will happen for sure. So, without further
adieu, i present you the Death Korps of Krieg! Yes indeed, today i will be having a game against this interesting army. Some people say that it's horrible, some people call it over-powered. Well, we'll find out right now! So, Krieg vs Daemons. For start, the point costs on both sides are 1850 (as usual) and the mission objective is annihilation(kill-points). Let's take a look at the armies. In the left corner .... emmm , this is a bit out of place in here, let's make it simple - Daemons of Chaos have:2 squads of Bloodletters, 2 Soul Grinders(both with the "Tongue" upgrade(Str10 AP1 24")), Fateweaver, Bloodthirster(Unholy Might(+1 Str), Blessing of the Blood God), Plaguebearers(Icon of Chaos, Instrument of Chaos), Bloodcrushers(Fury of Khorne(rending), Icon of Chaos, Instrument of Chaos), Pink Horrors(Changeling, Bolt of Tzeentch(Str8 AP1 24"), Screamers. On the other side here stands the mighty Krieg, with this unit composition: Infantry Platoon, Heavy weapons team, Leman Russ, Platoon Command squad, Centaur, 4 Hades Breaching Drills with 4 units of Engineers, Hellhound, squadron of 4 artillery pieces and crews for them, Quatermaster wis medical servitors.I, literally, have no idea about what i'm about to face as i have never fought against this army. One thing though - i really wish i brought my 'Grinders with the Phlegm(blast weapon), because the 50 men platoon scares me a bit.


Deployment and turns. I won the roll-of (hmm, i seem to roll these pretty good) and gave my opponent the chance of going first and choosing the table-side he wanted to deploy in. I, literally, have no idea of his grand plan here. The only things i know are that those drills will deep-strike somewhere and deal damage to nearby units, and i know that the heavy weapons team is very deadly with their las-cannons. For now, he deploys spreading up his forces across his side of the table. The artillery and the Heavy weapons are wisely kept behind, while the platoon stands in cover, but mostly in front of his forces. The Centaur carries the Quartemaster, as he grants the Feel No Pain to the nearby squads, so it is always close to the platoon.


Turn #1 - Krieg
Once again, as in most the situations, I'm not on the table in the first player's turn, so the only thing that happens here is little re-positioning here and there. All the Krieg's units move up (except for the artillery in the back) to get a bit more of the control over the table and to deny me some of my deep-striking space. Even the heavy weapons move closer to the center to extend their deadly range.


Turn #1 - Daemons
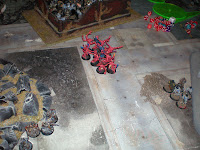
Oh well, it seems that my dice like to play these kind of jokes on me, as i , once again, failed my Daemonic Assault roll, and the second wave came in. This time though, i added a little more punch in the second wave, so that even this failure is not a total loss. To make long story short, Soul Grinder, Bloodthirster, 1 unit of Bloodletters, Plaguebearers and Screamers are the units that decided to come in on the first turn. I have decided to position them in a way that they get a cover save, while still being close to the enemy. I did a mistake though, as i decided to deploy the Soulgrinder and the 'Thirster on the left flank, while all the other units are concentrated on the right. I should have kept my army together. oh well , we can't undo what was already done long ago. The shooting phase was mostly, as always, used for running to position my units properly. The only shot i took was that from a Soulgrinder, trying to take out that Leman Russ, but failing to hit it.


Turn #2 - Krieg
And the fun has began. As did began the process of me learning about the Krieg a bit more. First of all, he seems to have a certain model in his command squad that gives him a +1 bonus to his reserve rolls, while at the same time giving me a -1 to my roll, making it all that much more difficult for the daemons. The second, and probably the most terrifying thing were his drills coming on the table. First of all, 3 out of 4 came in just this turn. Secondly, when they come out they hit like a train, not only dealing absurd amount of damage in a large area, but also delivering the melta effect on this hit, making my precious walker a wreckage before he even got to do anything at all. They also thinned my bloodletter's numbers a lot, not to mention the fact that the drills themselves can still be a problem with their meltas, and the fact that in the next turn his engineers will come out of the positions where drills appeared from, making a lot more trouble for me.


Now that the Krieg has targets on the battlefield, he decides to go for them. The platoon continues to move to the center, probably to be able to reinforce any place that may need help, the Hellhound moves closer to my Plaguebeares, ready to take them down with the assistance of the heavy weapons team. On the other side of the table the Leman Russ moves in a better position to engage the fierce Bloodthirster, as he sees much threat in that daemonic creature.
Unleash the death upon the enemy! Krieg's shooting is .... interesting, to say the least. Firstly, a lot of fire concentrated on the Plaguebearers, managing to destroy half of the squad(i never knew that Krieg's Hellhounds were able to shot small melta blasts, oh well , i know now .... i learn the hard way). But most importantly, i lost an Icon in that shooting phase, making it so much more difficult for my units to come on the board. On the other table edge the Leman Russ tank shot hi bolter at the Bloodthirster, not managing to do any damage at all. The funny thing happened when one of the drills tried to shoot it's melta blast weapon at the Plaguebearers. It seemed that the winds of chaos were a bit too strong that time, as the template scatters right back at the drill, managing to wreck it, showing that I'm not the only one who gets betrayed by his dice from time to time.


Turn #2 - Daemons
Due to very difficult weather in the warp, and some nasty enemy actions, the only unit capable to come in this turn were my Bloodcrushers. While they are a deadly for to face, without the assistance of the Fateweaver they can die rather quickly. In the movement phase i move up my available units to engage their first enemies this game. The only action in the shooting phase were some run movement from my bloodcrushers to spread them out a bit in order to avoid those nasty blast templates. Bloodthirster engages
the Leman Russ and manages to wreck it in a single hit, on the othe side of teh table the Bloodletters charge the closest dril, but fail to do anything against it. The last of the Screamers attacks the Hellhound in a wain attempt to bring down this beast, but was unable to even hit it due to the fact that it moved previous turn. So far so much, as we can see, i seem to be losing my strong units already, and my enemy didn't even use his infantry platoon against me.


Turn #3 - Krieg
First the important stuff. By which i mean the drill and the engineer teams. The last drill does come out, happily without doing any harm to my forces. Also, three engineer teams appear where the first drills came out of, as they are always appearing there in the next turn after the drills themselves, without any rolls whatsoever.


Finally the massive infantry platoon managed to move out of terrain, and the battle in the middle of the board is about to begin. But before we go there, there is some shooting to be done first. Engineers, capable of moving shooting and assaulting the turn they came in, surround my bloodleteers, and fire some shots with their shotguns, only managing to kill one though. The heavy weapons team, along with entire platoon (laspistols, but a lot of them), another engineer squad and the artillery all open fire at the unit of Bloodcrushers, managing to kill half of them, and leave the others with only one wound each. After that, the assaults commenced, as the two engineer squads charged the bloodletters, and the Bloodcrushers got assaulted bu the third squad of engineers, and the entire infantry platoon. While on the other side of the battle the combat was pretty even, with bloodletters killing few of the engineers, the epic clash in the middle was very short. Managing to kill only a couple of the Krieg guardsmen, the Bloodcrushers were overwhelmed by the massive tide of weak, but numerous guardsmen. With the Krieg's victory in the center, the platoon consolidated towards the bloodthirster, looking for another fight.


Turn #3 - Daemons
Wow! Finally some more powerful reinforcements managed to make their way into the battle. The other Soulgrinder, along with the Fateweaver himself appear on the board to provide additional firepower, and hopefuly, deal with this threat. And i make the same mistake once again by splitting my forces in two, as i deploy the Fateweaver and the Soulgrinder almost at the opposite sides of the table.


Only the Bloodthirster and Plaguebearers were able to move at this point, so i moved them closer to their potential targets - the 'Thirster to the artillery, and the Plaguebearers to reinforce my Bloodletters. The shooting resulted in a mere one soldier from the platoon dying. But still, there wasn't that much shooting to begin with. And here come the assaults. First of all, the Plaguebearers move in to finally eliminate the engineer squads, at the same time the Bloodthirster attacks the Centaur, as he was unable to reach the artillery this turn. The last screamer attempts to destroy the nearby drill. The casualties were, let's just say, expected. The Centaur went down, funny thing is that none of the crew survived the explosion, so the squad that was providing feel no pain is no more. The drill got immobilized, which is good enough at this point. I managed to thin-out the ranks of the engineers, but still they stay in combat. With the stubborn special rule, the Krieg is difficult to be sent fleeing.


Turn #4 - Krieg
The game quickly moves towards it's end, and i'm still was not able to do any severe damage. So, let's move on. The last engineer squad appear near the drill that got immobilized last turn. So that means that pretty much all the models are either dead, or are on the table(except for my pink horrors who seem to be stuck in the warp). Also, my opponent have saw the danger going towards his artillery guns in the back, so the platoon moves to intercept the Bloodthirster, and to at least stop him from doing too much damage.


Well, he must be pretty serious if goes this far. The entire the platoon and the nearby engineer squad assaults the Bloodthister, eager to bring him down. And what can i say? Sure they have low strength and weapon skill, but the sheer number of attacks was too much, there was no possible way for me to save that many wounds. In and epic fashion, the Bloodthirster dies, overwhelmed by the numerous Imperial Guard. The platoon consolidates towards the squads that i still have - the Fateweaver and the Plaguebearers, who were finally able release themselves out of combat and consolidate towards the Fateweaver.


Turn #4 - Daemons
No reinforcements, and the turns are getting shorter and shorter as the game progresses. I move the Fateweaver and what troops i have to engage th nearby engineer squad, as well as fire some shots at the platoon. The Soulgrinder is immobilized, but still can do some damage, which he did actually. Sadly, he misssed the shot fired at the artillery team. The Fateweaver shoots some of his arsenal of spells at the platoon, engineers and the drill, but was unable to do any kind of damage to any of the targets(BLAST, what the hell is with me dice rolling?!). So, as there is not much left to do, let's go to the assaults. Not to much here as well, the 'Bearers and the lonely Bloodletter engage the nearby engineers, and the Fateweaver attacks the drill, hoping to bring me some more kill-points. The result was good, but sort of expected. The engineers were taken out, and the drill became a wreck. But, while i am busy trying to grab as many kill-points as possible, the main threat moves closer and closer to me.


adieu, i present you the Death Korps of Krieg! Yes indeed, today i will be having a game against this interesting army. Some people say that it's horrible, some people call it over-powered. Well, we'll find out right now! So, Krieg vs Daemons. For start, the point costs on both sides are 1850 (as usual) and the mission objective is annihilation(kill-points). Let's take a look at the armies. In the left corner .... emmm , this is a bit out of place in here, let's make it simple - Daemons of Chaos have:2 squads of Bloodletters, 2 Soul Grinders(both with the "Tongue" upgrade(Str10 AP1 24")), Fateweaver, Bloodthirster(Unholy Might(+1 Str), Blessing of the Blood God), Plaguebearers(Icon of Chaos, Instrument of Chaos), Bloodcrushers(Fury of Khorne(rending), Icon of Chaos, Instrument of Chaos), Pink Horrors(Changeling, Bolt of Tzeentch(Str8 AP1 24"), Screamers. On the other side here stands the mighty Krieg, with this unit composition: Infantry Platoon, Heavy weapons team, Leman Russ, Platoon Command squad, Centaur, 4 Hades Breaching Drills with 4 units of Engineers, Hellhound, squadron of 4 artillery pieces and crews for them, Quatermaster wis medical servitors.I, literally, have no idea about what i'm about to face as i have never fought against this army. One thing though - i really wish i brought my 'Grinders with the Phlegm(blast weapon), because the 50 men platoon scares me a bit.


Deployment and turns. I won the roll-of (hmm, i seem to roll these pretty good) and gave my opponent the chance of going first and choosing the table-side he wanted to deploy in. I, literally, have no idea of his grand plan here. The only things i know are that those drills will deep-strike somewhere and deal damage to nearby units, and i know that the heavy weapons team is very deadly with their las-cannons. For now, he deploys spreading up his forces across his side of the table. The artillery and the Heavy weapons are wisely kept behind, while the platoon stands in cover, but mostly in front of his forces. The Centaur carries the Quartemaster, as he grants the Feel No Pain to the nearby squads, so it is always close to the platoon.


Turn #1 - Krieg
Once again, as in most the situations, I'm not on the table in the first player's turn, so the only thing that happens here is little re-positioning here and there. All the Krieg's units move up (except for the artillery in the back) to get a bit more of the control over the table and to deny me some of my deep-striking space. Even the heavy weapons move closer to the center to extend their deadly range.


Turn #1 - Daemons
Oh well, it seems that my dice like to play these kind of jokes on me, as i , once again, failed my Daemonic Assault roll, and the second wave came in. This time though, i added a little more punch in the second wave, so that even this failure is not a total loss. To make long story short, Soul Grinder, Bloodthirster, 1 unit of Bloodletters, Plaguebearers and Screamers are the units that decided to come in on the first turn. I have decided to position them in a way that they get a cover save, while still being close to the enemy. I did a mistake though, as i decided to deploy the Soulgrinder and the 'Thirster on the left flank, while all the other units are concentrated on the right. I should have kept my army together. oh well , we can't undo what was already done long ago. The shooting phase was mostly, as always, used for running to position my units properly. The only shot i took was that from a Soulgrinder, trying to take out that Leman Russ, but failing to hit it.


Turn #2 - Krieg
And the fun has began. As did began the process of me learning about the Krieg a bit more. First of all, he seems to have a certain model in his command squad that gives him a +1 bonus to his reserve rolls, while at the same time giving me a -1 to my roll, making it all that much more difficult for the daemons. The second, and probably the most terrifying thing were his drills coming on the table. First of all, 3 out of 4 came in just this turn. Secondly, when they come out they hit like a train, not only dealing absurd amount of damage in a large area, but also delivering the melta effect on this hit, making my precious walker a wreckage before he even got to do anything at all. They also thinned my bloodletter's numbers a lot, not to mention the fact that the drills themselves can still be a problem with their meltas, and the fact that in the next turn his engineers will come out of the positions where drills appeared from, making a lot more trouble for me.


Now that the Krieg has targets on the battlefield, he decides to go for them. The platoon continues to move to the center, probably to be able to reinforce any place that may need help, the Hellhound moves closer to my Plaguebeares, ready to take them down with the assistance of the heavy weapons team. On the other side of the table the Leman Russ moves in a better position to engage the fierce Bloodthirster, as he sees much threat in that daemonic creature.
Unleash the death upon the enemy! Krieg's shooting is .... interesting, to say the least. Firstly, a lot of fire concentrated on the Plaguebearers, managing to destroy half of the squad(i never knew that Krieg's Hellhounds were able to shot small melta blasts, oh well , i know now .... i learn the hard way). But most importantly, i lost an Icon in that shooting phase, making it so much more difficult for my units to come on the board. On the other table edge the Leman Russ tank shot hi bolter at the Bloodthirster, not managing to do any damage at all. The funny thing happened when one of the drills tried to shoot it's melta blast weapon at the Plaguebearers. It seemed that the winds of chaos were a bit too strong that time, as the template scatters right back at the drill, managing to wreck it, showing that I'm not the only one who gets betrayed by his dice from time to time.


Turn #2 - Daemons
Due to very difficult weather in the warp, and some nasty enemy actions, the only unit capable to come in this turn were my Bloodcrushers. While they are a deadly for to face, without the assistance of the Fateweaver they can die rather quickly. In the movement phase i move up my available units to engage their first enemies this game. The only action in the shooting phase were some run movement from my bloodcrushers to spread them out a bit in order to avoid those nasty blast templates. Bloodthirster engages
the Leman Russ and manages to wreck it in a single hit, on the othe side of teh table the Bloodletters charge the closest dril, but fail to do anything against it. The last of the Screamers attacks the Hellhound in a wain attempt to bring down this beast, but was unable to even hit it due to the fact that it moved previous turn. So far so much, as we can see, i seem to be losing my strong units already, and my enemy didn't even use his infantry platoon against me.


Turn #3 - Krieg
First the important stuff. By which i mean the drill and the engineer teams. The last drill does come out, happily without doing any harm to my forces. Also, three engineer teams appear where the first drills came out of, as they are always appearing there in the next turn after the drills themselves, without any rolls whatsoever.


Finally the massive infantry platoon managed to move out of terrain, and the battle in the middle of the board is about to begin. But before we go there, there is some shooting to be done first. Engineers, capable of moving shooting and assaulting the turn they came in, surround my bloodleteers, and fire some shots with their shotguns, only managing to kill one though. The heavy weapons team, along with entire platoon (laspistols, but a lot of them), another engineer squad and the artillery all open fire at the unit of Bloodcrushers, managing to kill half of them, and leave the others with only one wound each. After that, the assaults commenced, as the two engineer squads charged the bloodletters, and the Bloodcrushers got assaulted bu the third squad of engineers, and the entire infantry platoon. While on the other side of the battle the combat was pretty even, with bloodletters killing few of the engineers, the epic clash in the middle was very short. Managing to kill only a couple of the Krieg guardsmen, the Bloodcrushers were overwhelmed by the massive tide of weak, but numerous guardsmen. With the Krieg's victory in the center, the platoon consolidated towards the bloodthirster, looking for another fight.


Turn #3 - Daemons
Wow! Finally some more powerful reinforcements managed to make their way into the battle. The other Soulgrinder, along with the Fateweaver himself appear on the board to provide additional firepower, and hopefuly, deal with this threat. And i make the same mistake once again by splitting my forces in two, as i deploy the Fateweaver and the Soulgrinder almost at the opposite sides of the table.


Only the Bloodthirster and Plaguebearers were able to move at this point, so i moved them closer to their potential targets - the 'Thirster to the artillery, and the Plaguebearers to reinforce my Bloodletters. The shooting resulted in a mere one soldier from the platoon dying. But still, there wasn't that much shooting to begin with. And here come the assaults. First of all, the Plaguebearers move in to finally eliminate the engineer squads, at the same time the Bloodthirster attacks the Centaur, as he was unable to reach the artillery this turn. The last screamer attempts to destroy the nearby drill. The casualties were, let's just say, expected. The Centaur went down, funny thing is that none of the crew survived the explosion, so the squad that was providing feel no pain is no more. The drill got immobilized, which is good enough at this point. I managed to thin-out the ranks of the engineers, but still they stay in combat. With the stubborn special rule, the Krieg is difficult to be sent fleeing.


Turn #4 - Krieg
The game quickly moves towards it's end, and i'm still was not able to do any severe damage. So, let's move on. The last engineer squad appear near the drill that got immobilized last turn. So that means that pretty much all the models are either dead, or are on the table(except for my pink horrors who seem to be stuck in the warp). Also, my opponent have saw the danger going towards his artillery guns in the back, so the platoon moves to intercept the Bloodthirster, and to at least stop him from doing too much damage.


Shooting. While the Krieg, and the Imperial Guard at all, ado not have very powerful weaponry, they do have a lot of them. So, first thing, the platoon shoots it's las-pistols at the Bloodthirster, managing to inflict a single wound. The Heavy Weapons team's fire was far more effective, immobilising and removing one of the weapons off of the Soulgrinder. One of the free from combat engineer team's shot at the Fateweaver, incapable of dealing any wounds. The other one(the one that just arrive) killed the last of the Screamers, giving my opponent yet another kill-point.


Well, he must be pretty serious if goes this far. The entire the platoon and the nearby engineer squad assaults the Bloodthister, eager to bring him down. And what can i say? Sure they have low strength and weapon skill, but the sheer number of attacks was too much, there was no possible way for me to save that many wounds. In and epic fashion, the Bloodthirster dies, overwhelmed by the numerous Imperial Guard. The platoon consolidates towards the squads that i still have - the Fateweaver and the Plaguebearers, who were finally able release themselves out of combat and consolidate towards the Fateweaver.


Turn #4 - Daemons
No reinforcements, and the turns are getting shorter and shorter as the game progresses. I move the Fateweaver and what troops i have to engage th nearby engineer squad, as well as fire some shots at the platoon. The Soulgrinder is immobilized, but still can do some damage, which he did actually. Sadly, he misssed the shot fired at the artillery team. The Fateweaver shoots some of his arsenal of spells at the platoon, engineers and the drill, but was unable to do any kind of damage to any of the targets(BLAST, what the hell is with me dice rolling?!). So, as there is not much left to do, let's go to the assaults. Not to much here as well, the 'Bearers and the lonely Bloodletter engage the nearby engineers, and the Fateweaver attacks the drill, hoping to bring me some more kill-points. The result was good, but sort of expected. The engineers were taken out, and the drill became a wreck. But, while i am busy trying to grab as many kill-points as possible, the main threat moves closer and closer to me.


Turn #5 - Krieg
I just keep killing them, and they come for more... probably because most of my guys already died. The massive wave of infantry moves towards the Fateweaver, guns blazing and blades held high, ready to eliminate what stands in their path. The "guns blazing" part was not that great though, as no shots were able to effect the Fatweaver, proving once again, that this bird is just to tough to kill that easily. On the other had the artillery fire was able to do some damage, taking out the last of my Bloodletters. Not a big deal though, but at this point i actually needed every model i had on the table. The platoons charge was frightening, but ineffective, as no harm came to the 'Weaver. Unfortunately, the greater daemon of Tzeentch was unable to do anything himself!


Turn #5 - Daemons
Well, the game may be lost, but I'm not going out without a fight. The squad of pink horrors finally make their way on the table, unfortunately they are a bit too late, as the big target is tied up in combat. Oh well, I'll find a use for them. Plaguebearers moved up closer, ready to help out the Fateweaver in the assault. The Soulgrinder, poor immobilized Soulgrinder, in his anger he manages to actually do something, as the Str10 weapons hits the artillery team, one of the guns goes down. A bit too late for that, but still, i can't complain at this point. The Pink Horrors shot their Warpfire at the nearby engineer squad , totally decimating them. The Plaguebeares charge into the combat, trying to lend a hand in this situation. But they were cut down before even doing any damage. The Fateweaver still stands strong, so the battle continues.


Turn #6 and up to the game's end.
I decided to put the entire next turn into one section, as there is not to much to talk about. During the Krieg's turn the Pink Horrors were first - shot by artillery, second - shot by engineers, and third - assaulted and finally killed. Well, my opponent possibly wants to table me to hell, but he will probably be unable to, as the nobly thing that the heavy weapons have managed to do with the Soulgrinder was to knock off one more of his weapons(poor huy just stands there getting pummeled this entire game). In the assault the Fateweaber suffers only one wound, but manages to stay in combat and not dissapear into the warp. If the game would've continued to turn #7, the only thing there would be to tell about would have been that combat.


But now the game ends, we shake hands and ... wait, what !? What do you mean i won? I have 2 models left on the table, what the hell ?! Apparently its true, as the Krieg just had so many separate units, i was able to score more killpoints then he did! But still, i count this one as a loss.
So, i hope you enjoyed this battle-report. Leave comments describing your interesting battles with armies from imperial armor. Anyway, thank you very much for your attention, I'm Ursa06, and good luck to you.